1.
If you’re running Google Ads, you’ve probably wondered how to get a clearer picture of what happens after someone clicks on one of your ads. Enter the Google Click Identifier or GCLID. This little tag gets added to your URLs and helps you track the entire journey a user takes after they’ve clicked your ad.
In this guide, I’ll walk you through how to add GCLID tracking to Google Analytics 4 (GA4). It’s easier than it sounds, and once it’s set up, you’ll have a much better idea of which ads are really working.
2. What is GCLID?
In case you’re not familiar, GCLID stands for Google Click Identifier. Think of it as a fingerprint. Every time someone clicks on your Google Ad, the GCLID gets slapped onto the end of the URL. This unique string of characters helps you connect the dots between that click and what happens afterwards whether it’s a purchase, sign-up, or a bounce.
3. Why You Should Track GCLID in GA4?
Well, without it, you’re kind of flying blind. Here’s why tracking GCLID is so important
- Know which ads work: It helps you figure out which ads or campaigns are actually driving results, not just clicks.
- Optimise for better results: Once you see what users do after clicking, you can tweak your ads to improve performance.
- Link ads to user actions: You can track the entire user journey from the moment they click on your ad to whatever they do next on your site.
4. Steps to Add GCLID to Google Analytics 4
Alright, let’s dive into how you can set up GCLID tracking in GA4. Don’t worry, I’ll break it down step by step.
4.1 Step 1: Enable Auto-tagging in Google Ads
The first thing you’ll want to do is make sure auto-tagging is enabled in your Google Ads account. This is what lets Google automatically add the GCLID to your URLs.
- Log in to Google Ads: Head over to your Google Ads account. You know the drill.
- Go to Settings: Click the little wrench icon in the sidebar (Google likes to call it the Admin icon).

- Enable Auto-Tagging: In the Auto-tagging section, there’s a box that says “Tag the URL that people click through from my ad.” Go ahead and check that.
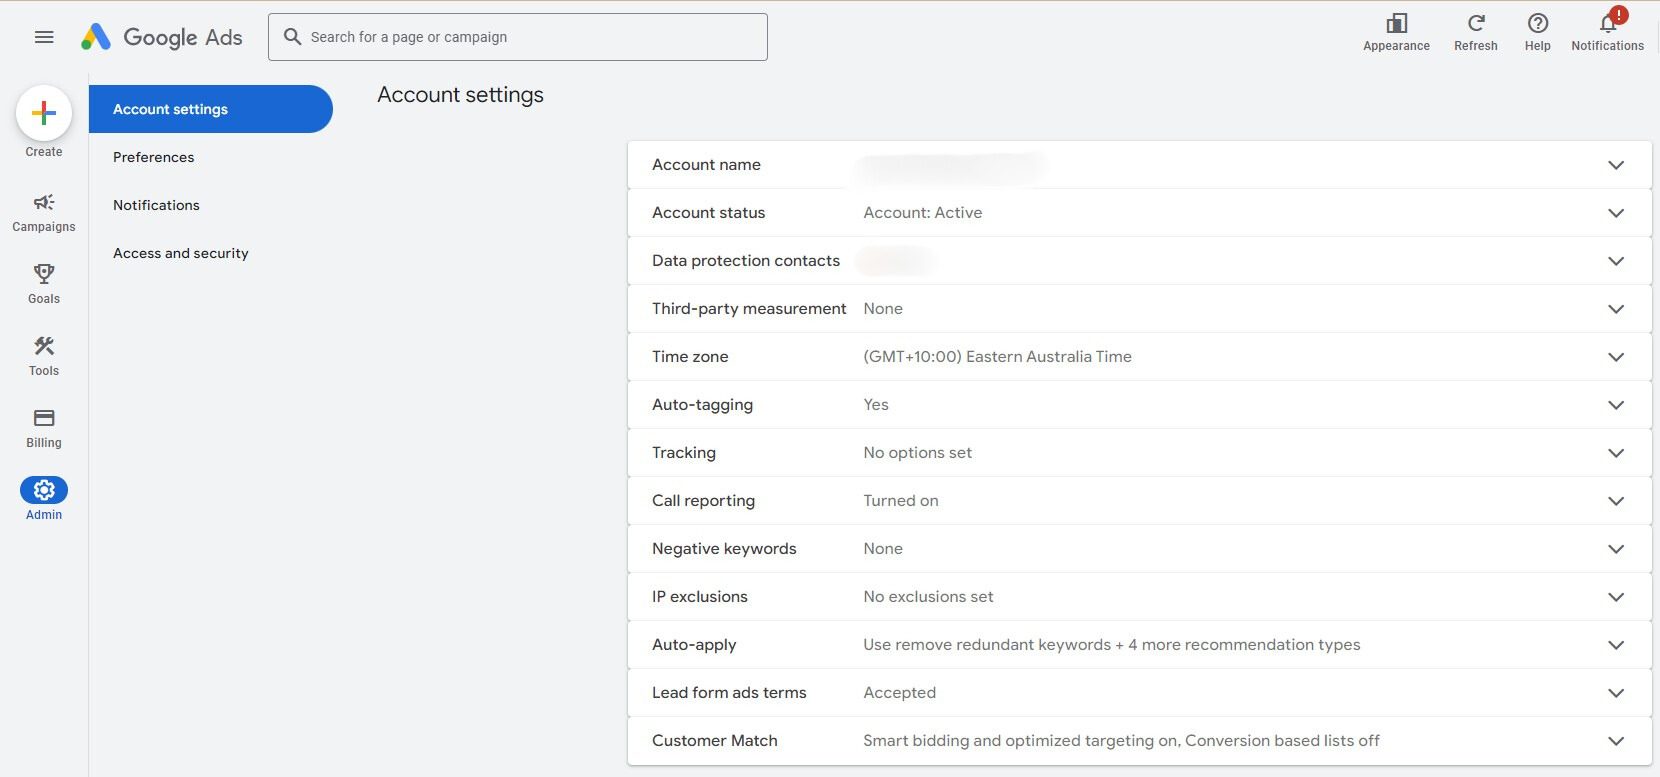
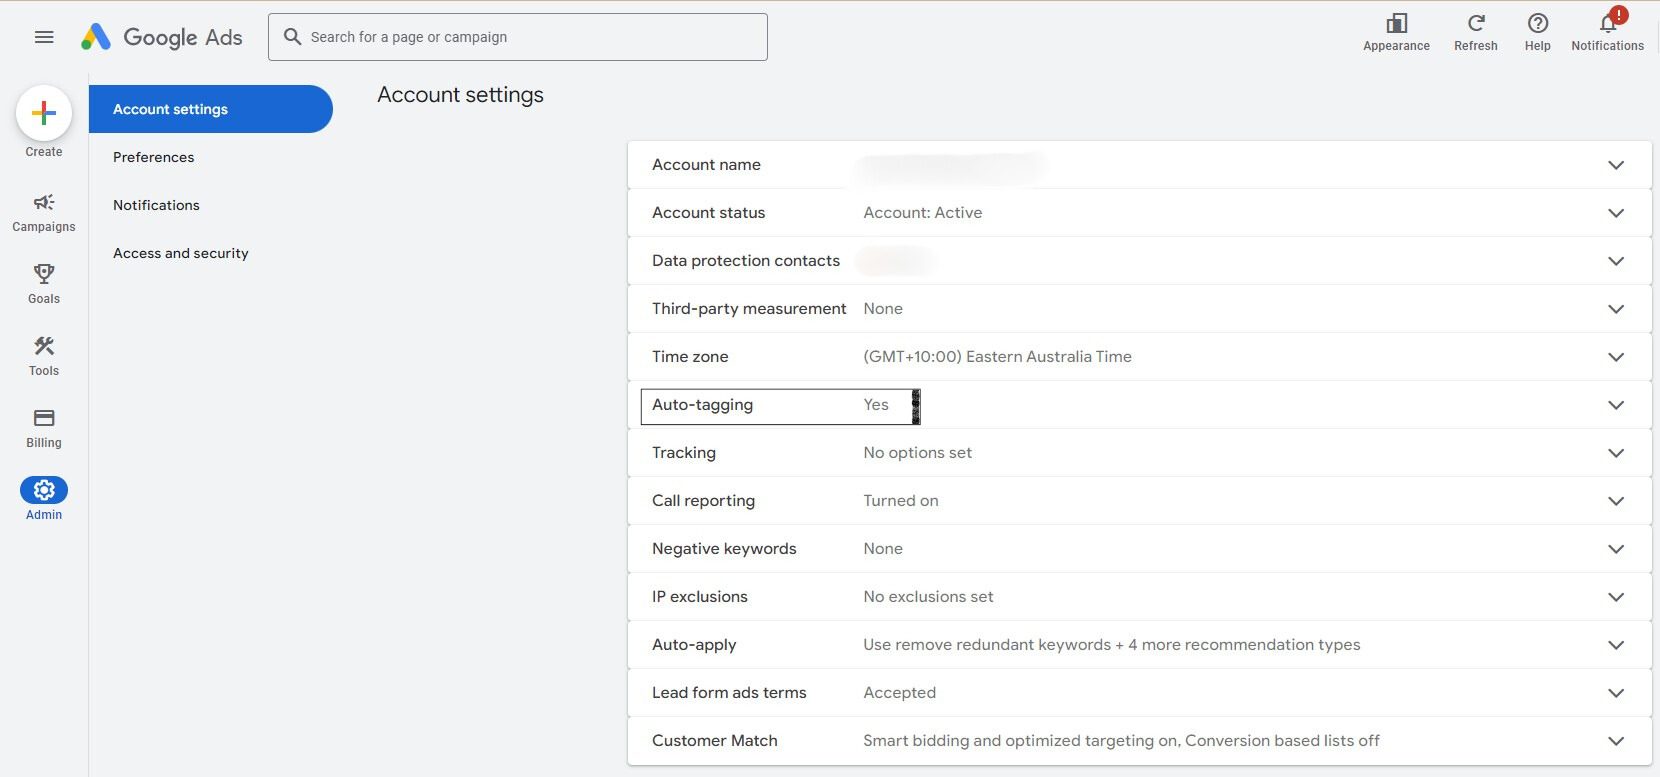
Now every time someone clicks your ad, the GCLID gets tacked onto the URL automatically. Simple, right?
4.2 Step 2: Link Google Ads to Google Analytics 4
Now that auto-tagging is on, the next thing we need to do is link your Google Ads account to GA4. This is crucial for tracking all that GCLID goodness.
- Log in to Google Analytics: Go to Google Analytics and select the GA4 property you want to work with.
- Link Google Ads: In the Admin panel (bottom-left corner), you’ll see “Product Links.” Click that, then hit “Google Ads Links,” and start the linking process.
- Follow the Prompts: Google’s going to ask you a few questions to complete the linking. Just follow along, and you’re good to go!
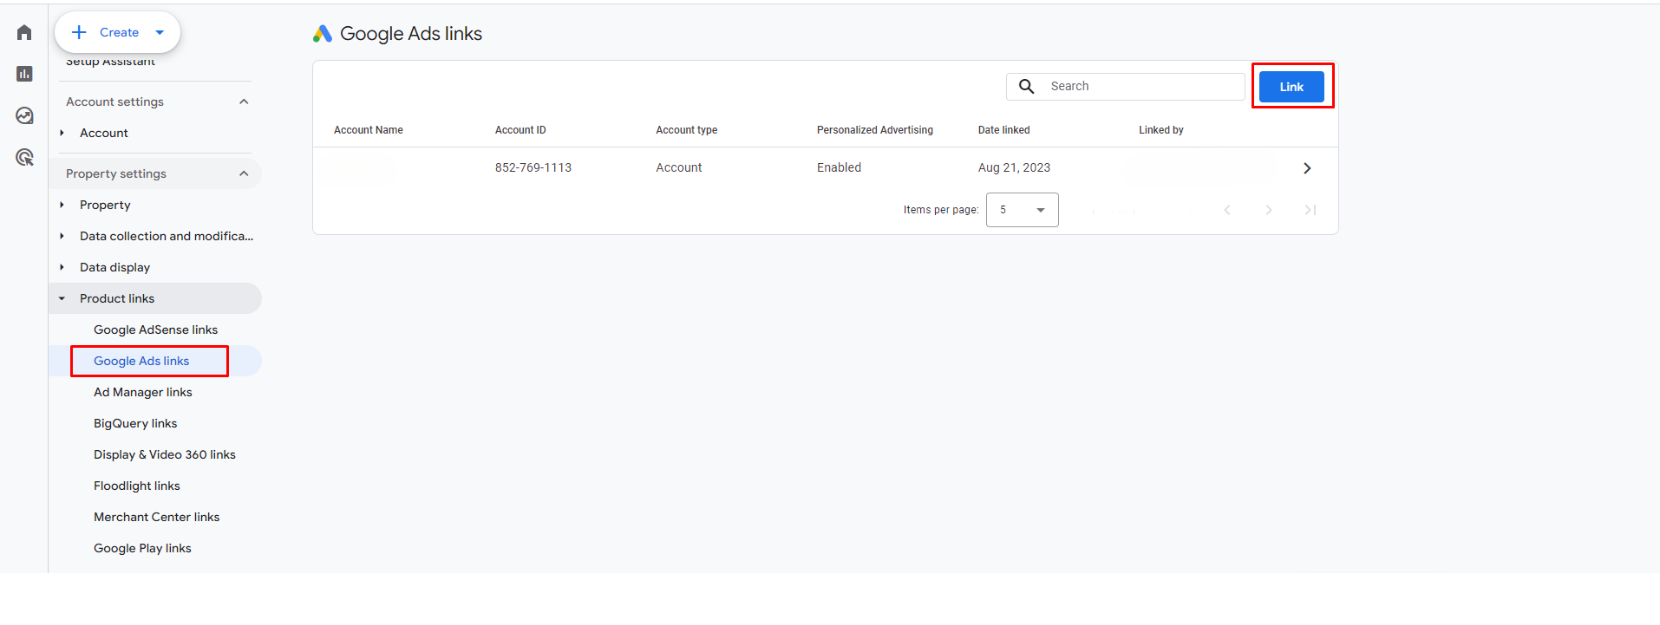
Now GA4 and Google Ads are best buds, and you’ll be able to track GCLID along with other Google Ads data.
4.3 Step 3: Set up GCLID Tracking in Google Tag Manager
Alright, now we’re getting to the fun part: setting up GCLID tracking using Google Tag Manager (GTM). This is how we capture that GCLID and send it over to GA4.
- Create a GA4 Configuration Tag: In GTM, go to Tags > New, and select Google Analytics: GA4 Configuration.
- Enter your GA4 Measurement ID (you’ll find this in GA4 under Admin > Data Streams).
- Under “Fields to Set,” add a new field:
- Field Name: gclid
- Value: {{URL Variable GCLID}}
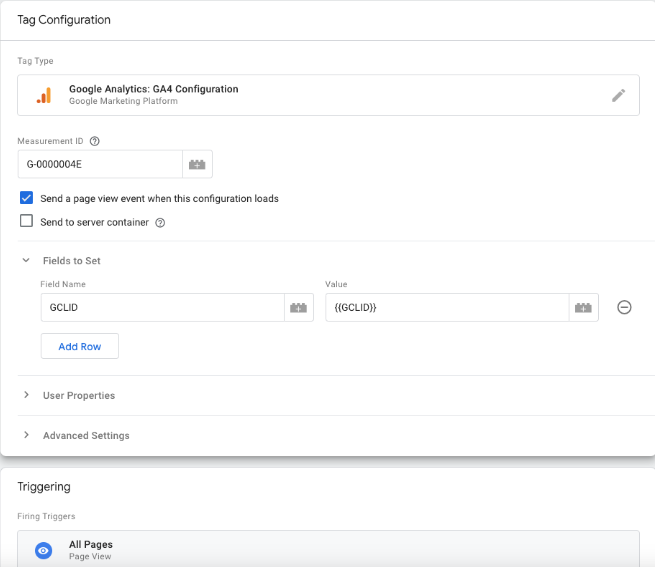
This tells GA4 to capture the GCLID from the URL and send it to GA4.
- Create a URL Variable: Now, head over to Variables > New, and select “URL Variable.” Set the Query Key to gclid. This will grab the GCLID from the URL whenever someone clicks your ad.
- Publish Your Changes: Once you’ve set up the tag and variable, click “Submit” in GTM to publish everything.
And that’s it! Now you’re officially tracking GCLID in GA4.
4.4 Step 4: Test and Verify GCLID Tracking
Before we finish, let’s make sure everything is working properly. You don’t want to go through all this just to find out nothing is tracking.
- Preview in GTM: In Google Tag Manager, click “Preview” and test your setup on your site. Make sure the GCLID parameter is getting captured when someone clicks an ad.
- Check GA4 DebugView: Over in GA4, go to DebugView and keep an eye on user sessions. You should see the GCLID parameter coming through along with the rest of your data.
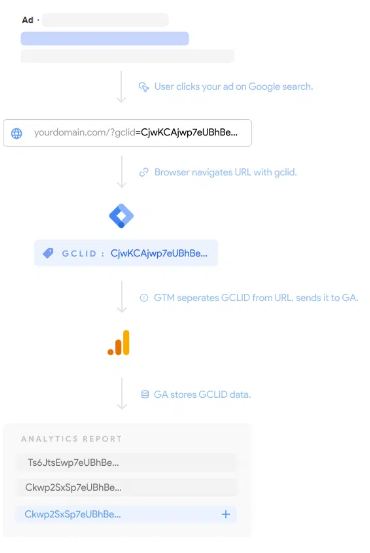
If everything checks out, you’re all set!
4.5 Step 5: Analyse GCLID Data in GA4
Now comes the good part—actually using the data! In GA4, head over to the Acquisition reports to see how your Google Ads traffic is performing.
- View Acquisition Reports: Go to Reports > Acquisition and take a look at your Google Ads data. You can see how different campaigns are driving traffic and conversions.
- Create Custom Reports: Want even more detail? You can set up custom reports under the Explore tab to dive deeper into how GCLID is impacting your ad performance.
5. Conclusion
And there you have it! By adding GCLID tracking to Google Analytics 4, you’re giving yourself a powerful way to see what’s really going on with your Google Ads. This setup lets you track clicks, user behaviour, and conversions, all in one place.
So, go ahead and link up those accounts, set up your tags, and start using GCLID data to optimise your campaigns for better results. Happy tracking!

 Previous