- Ecommerce
- Google Analytics
Power Google Analytics 4 with eCommerce Tracking: The Ultimate Setup Guide
03 May 2023We as eCommerce experts can’t emphasise enough how important it is to track your website’s performance, measure your marketing campaigns, and optimise your online store for better conversions.
1. Introduction
We as eCommerce experts can’t emphasise enough how important it is to track your website’s performance, measure your marketing campaigns, and optimise your online store for better conversions. And one of the most powerful tools for achieving these goals is GA4 ecommerce tracking.
Have you heard about the game-changing Google Analytics 4 (GA4)? This newest version takes a customer-centric approach to tracking user behaviour, thanks to its advanced features like machine learning, cross-device monitoring, and enhanced eCommerce events tracking. With ecommerce setup in GA4, you’ll be able to understand your customers’ journey like never before and make killer business decisions that’ll take your brand to the next level.
In this article, we’ll guide you through the steps of setting up GA4 ecommerce setup for your online store.
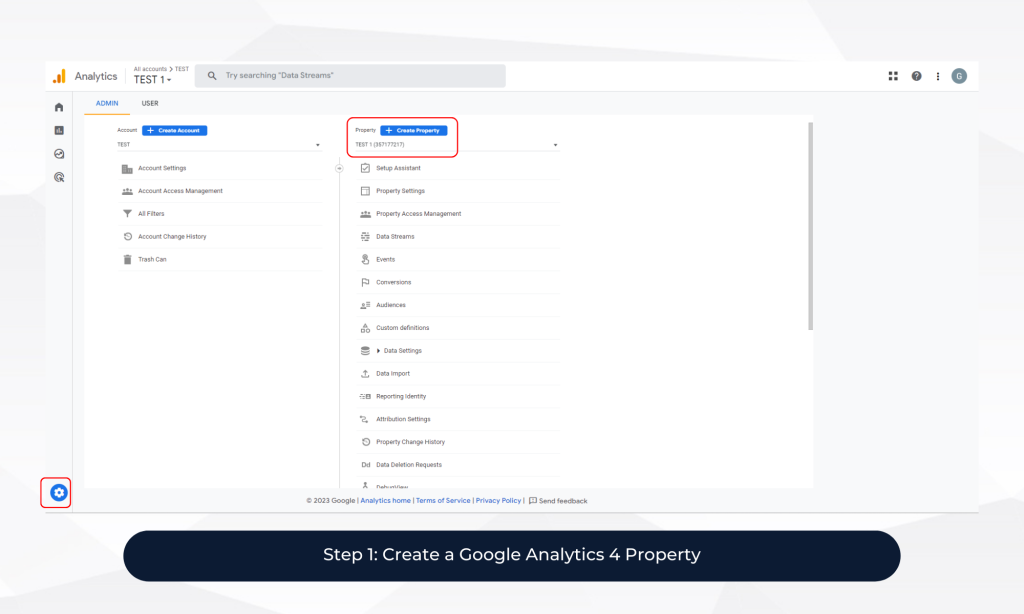
2. Step 1: Create a Google Analytics 4 Property
The first step is to create a new Google Analytics 4 property for your eCommerce website. To do this, log in to your Google Analytics account and click on the “Admin” tab. From there, select “Create Property” and choose “Web.”
You’ll be prompted to enter your website’s URL, property name, time zone, and currency. After filling out the required information, click on “Create.”
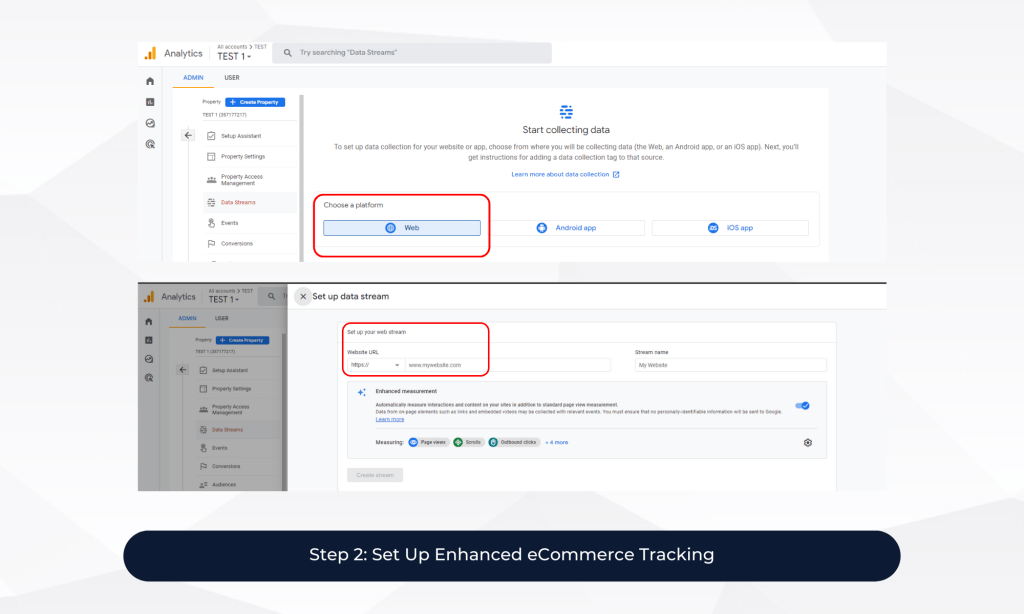
3. Step 2: Set Up Enhanced eCommerce Tracking
Enhanced eCommerce tracking is a feature that allows you to track detailed information about your customer’s shopping behaviour, such as product impressions, clicks, and purchases. To set up enhanced eCommerce tracking in GA4, follow these steps:
- Go to your GA4 property and click on “Data Streams” under the “Streams” section.
- Click on the “Add Stream” button and select “Web.”
- Enter your website’s URL and other required information.
- After setting up the data stream, click on “Configure Tagging.”
- Toggle on the “Enhanced eCommerce” switch and click on “Save.”
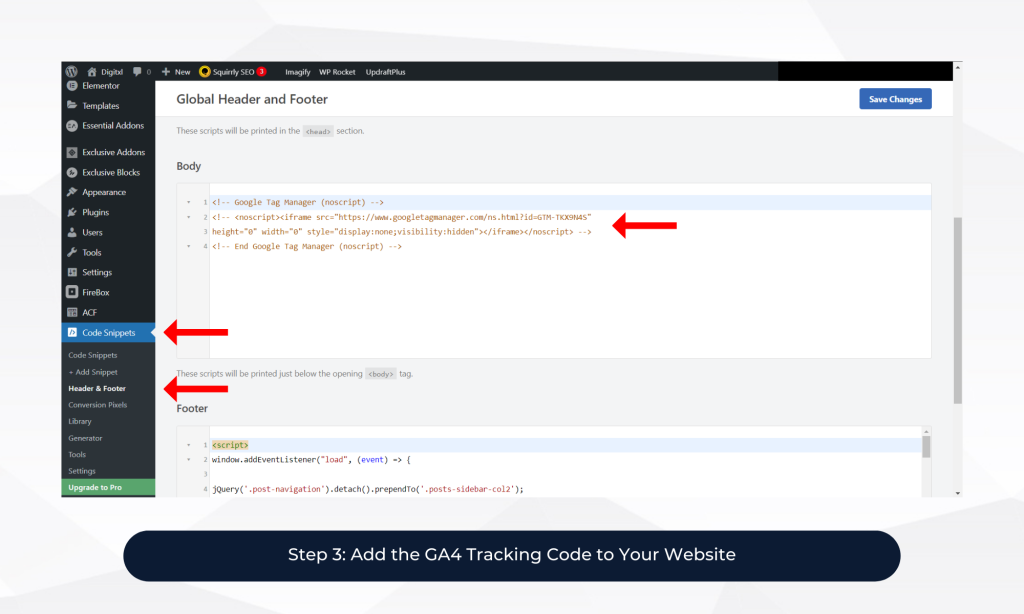
4. Step 3: Add the GA4 Tracking Code to Your Website
The next step is to add the GA4 tracking code to your website. To do this, you’ll need to copy the tracking code from your GA4 property and paste it into the header section of your website.
You can find the tracking code by going to your GA4 property and clicking on “Tagging” under the “Measurement” section. From there, select “Web” and copy the tracking code.
Once you’ve copied the tracking code, you can add it to your website’s header section using Google Tag Manager or by adding it directly to your website’s code.
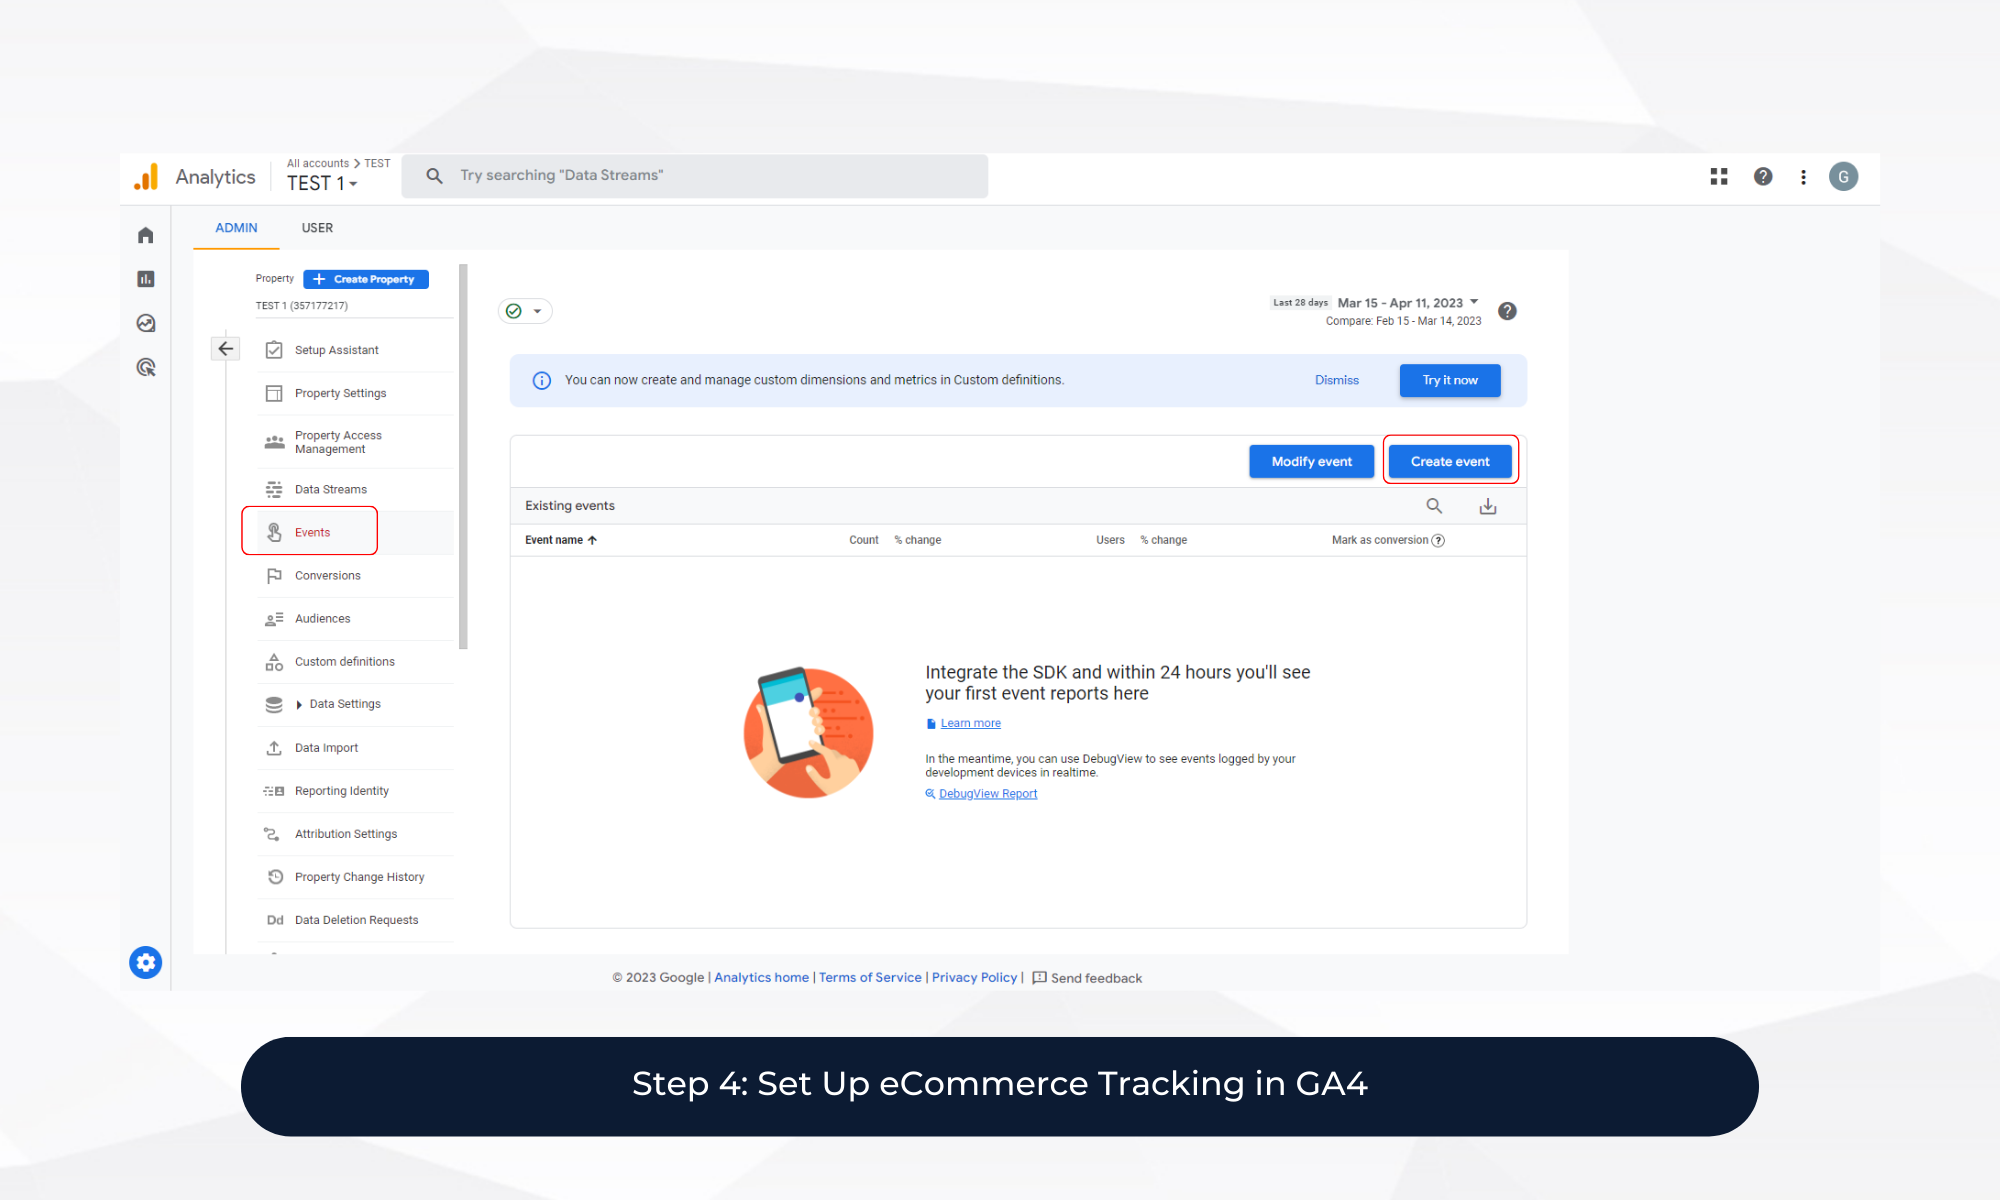
5. Step 4: Set Up eCommerce Tracking in GA4
Now that you’ve set up enhanced eCommerce tracking and added the GA4 tracking code to your website, you can start tracking your eCommerce data in GA4.
- Go to your GA4 property and click on “Events” under the “Events” section.
- Click on “Configure Events” and select “Ecommerce.”
- Toggle on the “Enable Ecommerce” switch and fill out the required information, such as your eCommerce platform and currency.
- After setting up eCommerce tracking, you’ll be able to track events such as “view_item,” “add_to_cart,” “remove_from_cart,” and “purchase” in your GA4 reports.
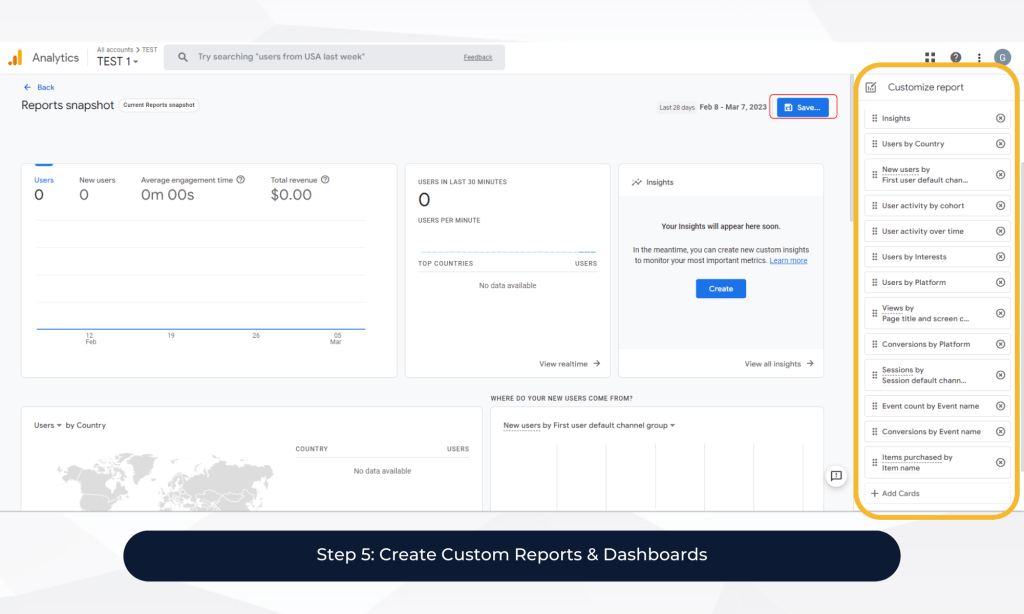
6. Step 5: Create Custom Reports and Dashboards
Finally, you can create custom reports and dashboards to analyse your eCommerce data in GA4. Custom reports and dashboards allow you to visualise your data in a way that’s meaningful for your business.
- Go to your GA4 property and click on “Analysis” under the “Analysis” section.
- Select “Custom Reports” or “Custom Dashboards” and
- Choose the type of report or dashboard you want to create and select the metrics and dimensions you want to include.
- Once you’ve customised your report or dashboard, you can save it for future use and share it with your team to make unanimous decisions based on data.
7. Examples of useful custom reports and dashboards for eCommerce businesses:
- Conversion rate by traffic source: This report shows you which traffic sources are driving the most conversions, so you can optimise your marketing efforts.
- Product performance dashboard: This dashboard shows you which products are selling the most, which products have the highest return rate, and which products have the highest cart abandonment rate.
- Checkout funnel report: This report shows you how many customers are dropping out at each stage of the checkout process, so you can identify and fix any issues.
8. Congratulations! You’ve successfully set up e-commerce tracking in GA4!
Rev up your eCommerce game with GA4 ecommerce tracking! Say goodbye to guessing and hello to data-driven decision-making. From measuring your marketing campaigns to optimising your online store for better conversions, this tool has it all.
Ready to dive in? Follow the steps in this article to set up enhanced eCommerce tracking, add the GA4 tracking code to your website, and create custom reports and dashboards to analyse your data like a pro.
Unlock the full potential of GA4 ecommerce setup! Don’t just collect data, make it work for you. Dive deep into your insights and let them guide you to eCommerce success.
9. FAQ
Q. What is GA4, and how does it benefit eCommerce businesses?
A. Google Analytics 4 (GA4) is the latest version of Google Analytics, offering a customer-centric approach to tracking user behavior. For eCommerce businesses, GA4 provides enhanced features like machine learning, cross-device tracking, and detailed event tracking (such as product views, adds to cart, and purchases). These features enable businesses to track every step of the customer journey, allowing for better decision-making and optimization of marketing campaigns and conversion rates.
Q. How do I set up GA4 for my eCommerce website?
A. To set up GA4 for your eCommerce website, follow these steps: Create a GA4 Property: Log into Google Analytics, click “Admin,” and create a new property for your website. Set Up Enhanced eCommerce Tracking: Enable enhanced eCommerce in the GA4 settings to track detailed shopping behavior. Add the GA4 Tracking Code: Copy the tracking code from GA4 and insert it into the header of your website using Google Tag Manager or directly in your website’s code. Enable eCommerce Tracking: Go to your GA4 property, select “Events,” and configure eCommerce events like
Q. What are some key eCommerce events I should track with GA4?
A. The essential eCommerce events you should track with GA4 include: view_item: When a customer views a product page. add_to_cart: When a customer adds a product to their shopping cart. remove_from_cart: When a customer removes an item from their cart. purchase: When a customer completes a transaction. Tracking these events gives you insights into the customer journey and helps you optimize conversions and cart abandonment.
Q. How can I create custom reports and dashboards in GA4 for my eCommerce business?
In GA4, you can create custom reports and dashboards by going to the “Analysis” section and selecting either “Custom Reports” or “Custom Dashboards.” Here’s how: Choose the type of report or dashboard you want to create (e.g., conversion rates, product performance, checkout funnel). Select the metrics and dimensions that matter most to your business (e.g., traffic source, product category, cart abandonment rate). Save the report or dashboard for future use and share it with your team for data-driven decision-making.
Q. What are some useful custom reports and dashboards for eCommerce businesses in GA4?
A. Here are some helpful reports and dashboards for eCommerce businesses: Conversion Rate by Traffic Source: Shows which traffic sources are driving the most conversions, helping you optimize your marketing efforts. Product Performance Dashboard: Displays which products are selling the most, which have the highest return rates, and which are most frequently abandoned in carts. Checkout Funnel Report: Analyzes where customers drop off during the checkout process, helping you identify and address friction points.

Recent Posts


Case Studies
Business News Australia
On Track Meals
Suncorp

